
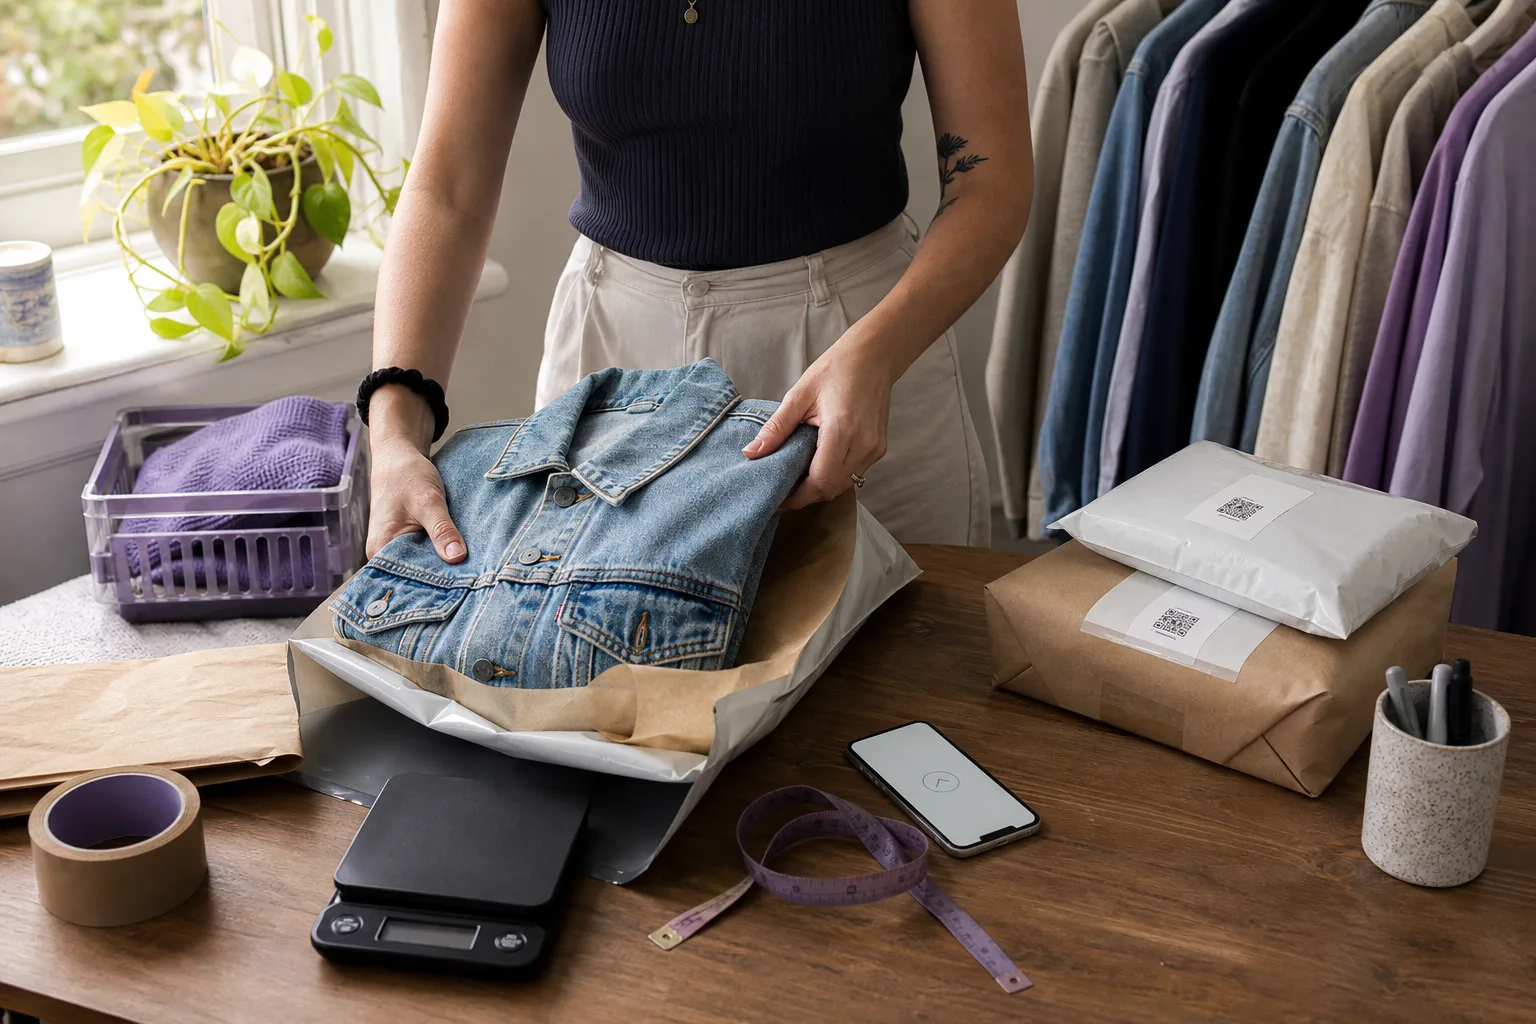
You made a Depop sale. Now you need to turn the buyer’s address into an Australia Post label and get the parcel moving.
Depop now documents Depop Shipping via Australia Post for new listings. Older listings can retain Manual shipping. Open your sold order first: a supplied label or QR code means you should not buy a second label yourself.
The basic workflow is:
Depop sold order → check shipping method → use the supplied label or arrange manual postage → lodge the parcel.
First, check which shipping method the sale uses
| What the order shows | What to do |
|---|---|
| Depop Shipping | Use the supplied Australia Post label or QR code; tracking is handled through that label |
| Manual shipping | Arrange tracked delivery and add its tracking number to Depop |
If Depop supplies the label
Find it in the sale email or sold-order screen. Print the label, or take its QR code to a participating Post Office. Follow the order’s dispatch instructions and keep proof of lodgement. Do not replace a supplied Depop label with one bought elsewhere.
The official Australian shipping guide, checked 28 September 2026, says new listings use Depop Shipping while older listings can retain manual postage. It does not give a usable transition date in its manual-shipping section, so the order itself is the practical check.
Where do I find the Depop label or QR code?
| Device | Where to look |
|---|---|
| iPhone | My Depop → Sold → select the item → Ship your item now |
| Android | Selling Hub → Sold items → select the item → View shipping label |
| Website | Profile picture → Your selling hub → Sold → select the order |
The sale email also contains the label and QR code. Use the QR code at a Post Office that offers label printing. Parcel lockers and street posting boxes require the printed label attached beforehand.
Do I need to mark a Depop-label order as shipped?
No. Depop says tracking and shipment status update through its label. For manual orders, add tracking yourself and check it before saving: Depop says it cannot be amended afterwards.
The steps below cover manual-shipping orders. Skip the MyPost Business purchase steps when Depop has already supplied your label.
What you need before creating the label
Have these ready:
- the item, fully packed
- the parcel’s weight
- the parcel dimensions if you are using your own packaging
- your sender name and return address
- the buyer’s name and delivery address from the Depop receipt
- a MyPost Business account or another tracked-postage service
- a way to print the label, or access to a participating Post Office
Pack the item before entering the weight. A jumper might fit one rate when loose but move into another after the satchel, tissue, cardboard or protective layer is added.
For bulky parcels, the Australia Post cubic-weight calculator can help you check the effect of the box dimensions.
Step 1: Find the delivery address in Depop
On the Depop website:
- Open your profile menu.
- Go to Selling Hub.
- Select Sold.
- Open the order you are packing.
- Check the Shipped to or delivery-address section.
In the app, open your sold items and select the order.
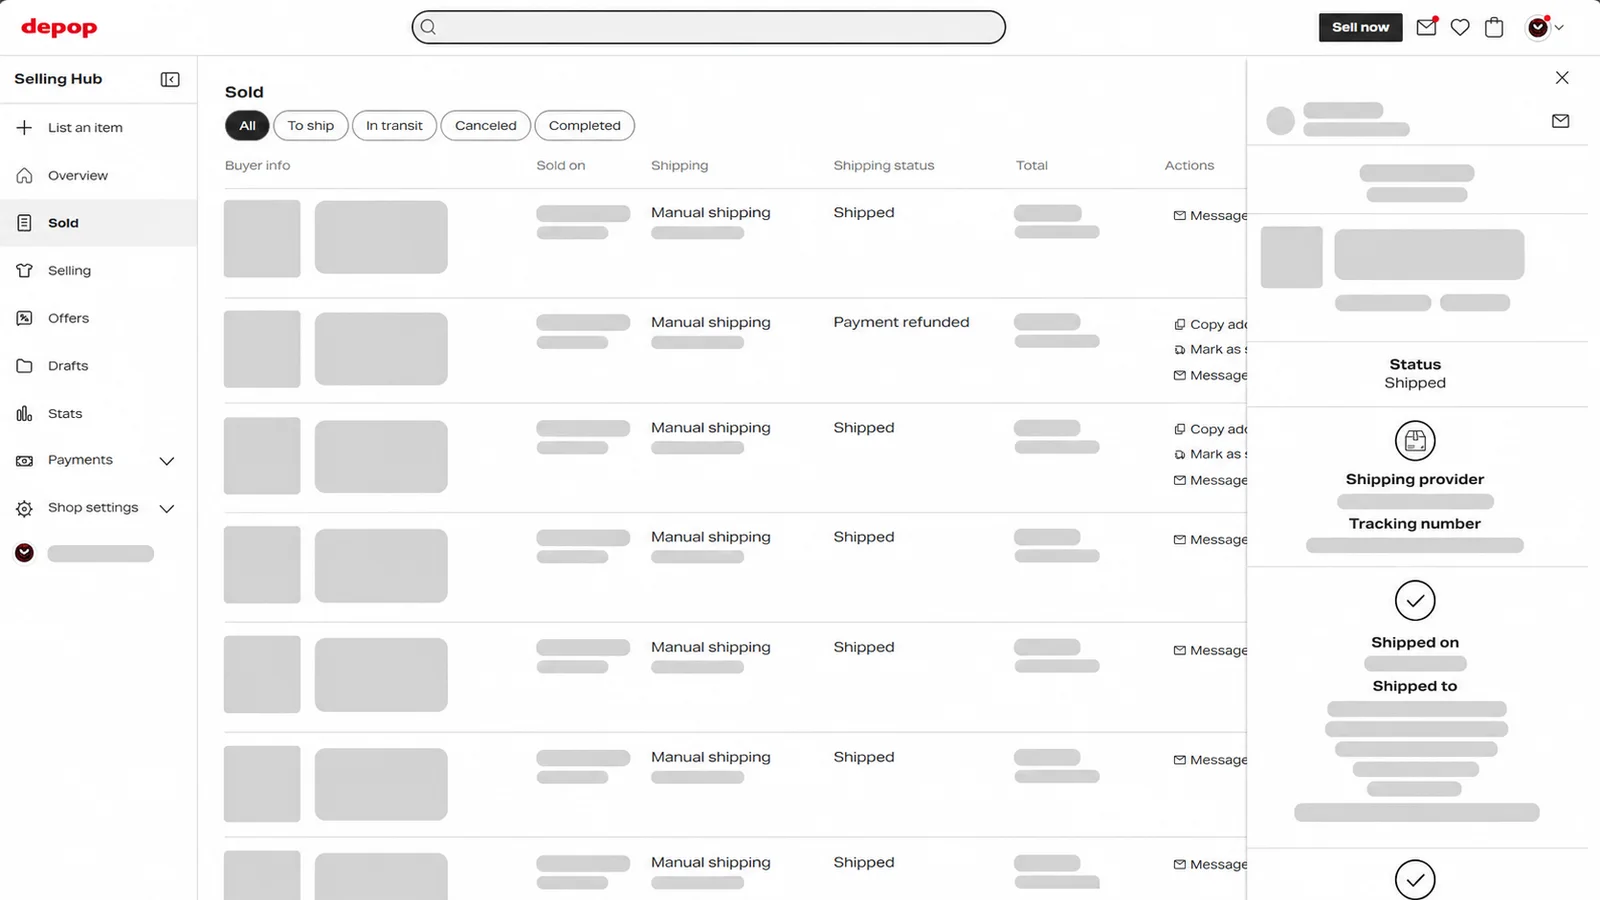
Example only: all buyer, seller and order details have been permanently redacted.
Copy the buyer’s:
- full name
- unit or street address
- suburb
- state
- postcode
- country, if displayed
Use the address recorded on the Depop sale. Do not take an alternative address from a direct message.
If the buyer asks you to change the address
Do not edit the address yourself or write a different address over the label.
Depop’s guidance says to refund the order, ask the buyer to update their address inside Depop and then let them purchase again. This keeps the payment, order and delivery records aligned.
Step 2: Add the Depop order to MyPost Business
Sign in to MyPost Business, then:
- Open the Orders tab.
- Select Add an order.
- Enter your details under Send from.
- Enter the Depop buyer’s details under Deliver to.
- Add the packed parcel’s packaging type, weight and dimensions.
- Choose Parcel Post, Express Post or another suitable tracked service offered for the parcel.
- Add Signature on Delivery or Extra Cover if appropriate for the item’s value.
- Select Save order, then Pay & print.
Australia Post recommends leaving address validation switched on. Check that the suggested address still matches the Depop receipt, especially the unit number and postcode.
The buyer’s phone number and email are not normally mandatory for a standard domestic street address. If you choose to send Australia Post tracking notifications, an email address may be required. Only use contact information supplied for fulfilling that order.
Step 3: Choose the right Australia Post service
The cheapest-looking option is not useful if the parcel does not fit its limits.
Before paying, check:
- the packed weight
- the external parcel dimensions
- whether the item is safe in a satchel or needs a box
- whether tracking is included
- whether the value justifies Extra Cover or Signature on Delivery
- the delivery speed promised to the buyer
A light T-shirt may suit a satchel. Shoes, a structured handbag, fragile accessories or a valuable coat may be safer in a box.
The Australia Post own-packaging versus flat-rate guide explains the trade-offs. You can also compare common options in the Australian reseller postage comparison.
Step 4: Print the label with a normal printer
You do not need a thermal label printer to start shipping Depop orders.
Australia Post supports several domestic label formats, including:
- A4, one label per page
- A4, four labels per page when using compatible label sheets
- A6 for a thermal label printer
For an ordinary inkjet or laser printer, choose the A4 one label per page setting in MyPost Business and print on plain white paper.
Use these checks:
- Print in black ink on clean, matte white paper.
- Do not scale the PDF or use a “fit to page” setting that shrinks the barcode.
- Make sure the address and every barcode line are sharp and complete.
- Trim away excess paper without cutting into the label.
Australia Post also offers free A4 label sheets at Post Offices for use with suitable printers. If you ship regularly, self-adhesive sheets or a thermal printer can make the process faster, but neither is required for your first sale.
Step 5: Tape the paper label onto the satchel or box
If you printed on plain A4 paper, place the trimmed label in the centre of the flattest surface.
Secure it with strong tape around all four edges so it cannot lift or tear away during sorting.
The important part is what not to do:
- do not place tape over the barcode or printed label area
- do not wrap the label around a corner
- do not place it across a box opening or satchel seam
- do not crease the barcode
- do not leave old labels or barcodes visible
- do not overfill a satchel until the label curves or wrinkles
Australia Post says labels should remain clear, visible and uncovered by tape. Do not cover the entire label with clear tape: the glossy surface can reflect light, wrinkle and make the address or barcode harder to scan. Taping around the outside edge holds a plain-paper label in place without interfering with the printed area.
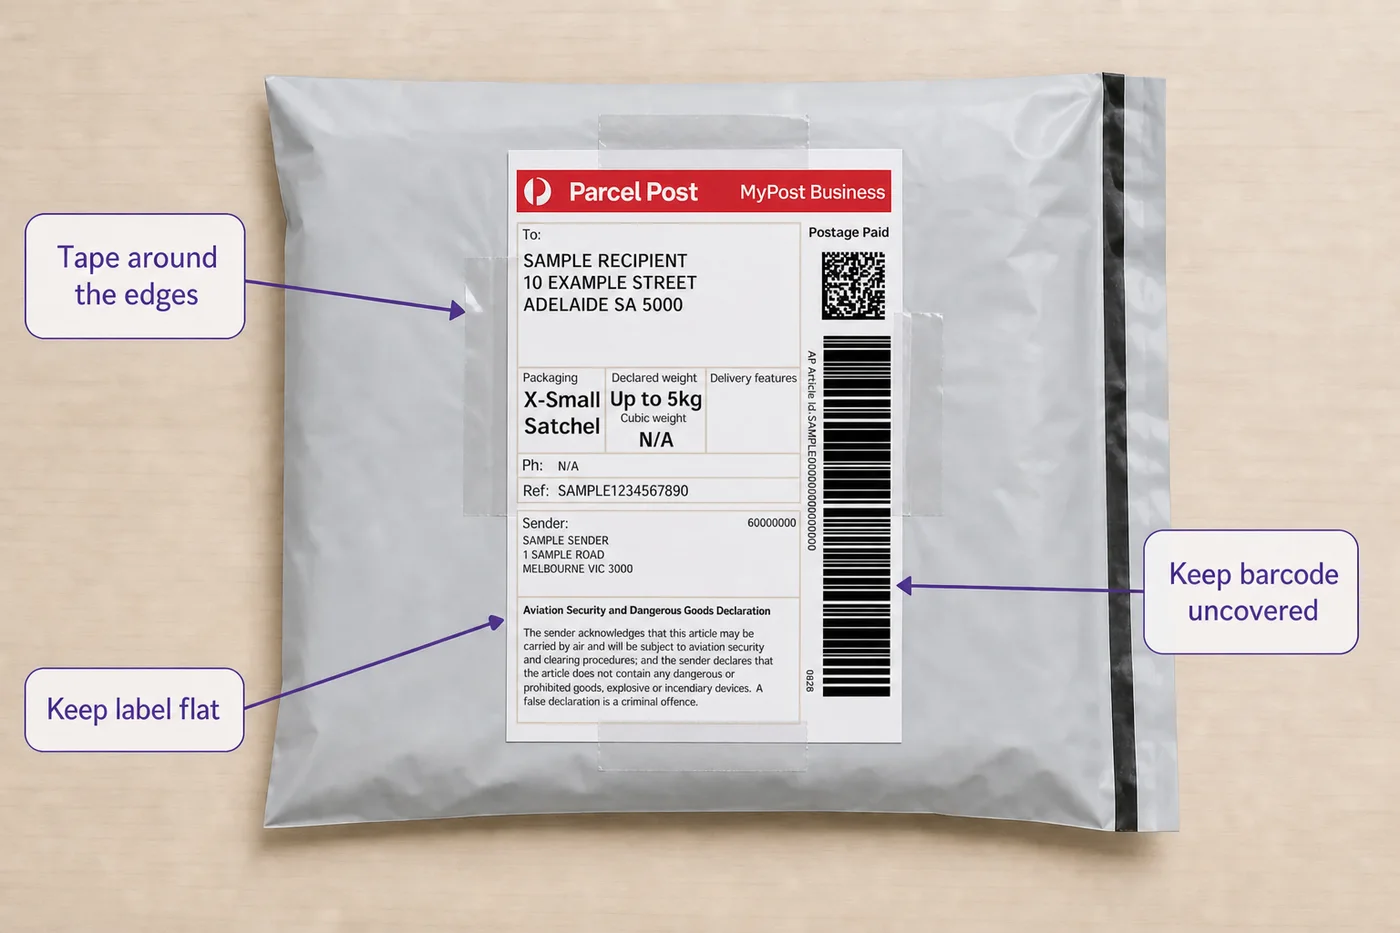
For a recycled box or satchel, remove or completely cover every old address and barcode before attaching the new label.
What if you do not have a printer?
MyPost Business may offer an in-store printing option for eligible labels. After paying, choose the option to print at a participating Post Office and take the generated QR code with you.
Australia Post says these in-store label QR codes are available for a limited time, so check the expiry shown when you create the order.
You can also take a correctly addressed parcel to a Post Office and purchase postage at the counter. Ask for tracked delivery and keep the receipt.
Step 6: Lodge the parcel and keep proof
Creating a label is not proof that you handed the parcel to Australia Post.
Lodge it at an appropriate Post Office or Australia Post drop-off point and keep the lodgement receipt. Check later that the first tracking scan has appeared.
Depop recommends using tracked shipping and keeping proof until the item has been safely delivered.
For a valuable sale, consider photographing the packed item and attached label before lodgement. Keep any condition photos as well. Avoid storing or sharing the buyer’s address longer than needed to fulfil the order.
Step 7: Add the Australia Post tracking number to Depop
Return to the sold order after the parcel has been lodged.
For a manually shipped order:
- Open the sale receipt.
- Select Mark as shipped.
- Choose Australia Post as the shipping provider when available.
- Enter the tracking number carefully.
- Confirm the shipping update.
Depop’s web Selling Hub displays the shipping provider, tracking number, shipping date and delivery address in the sold-order panel. The buyer can then follow the parcel without repeatedly asking for an update.
Copy the tracking number from the Australia Post label or receipt rather than typing it from memory. Check every digit before saving.
If the order used Depop Shipping, tracking may already be connected. Follow the order instructions rather than marking it shipped a second time.
How much is Depop shipping in Australia?
For Depop Shipping, check the charge and parcel requirements shown in the listing or order. The $10.95 used in our fee example is an illustrative manual-postage amount, not a universal Depop label price.
For manual shipping, set the amount before the item sells.
A practical estimate includes:
current postage quote
+ satchel, box and protective materials
+ optional cover or signature
+ any payment-processing effect on the shipping amount
Do not use one guessed shipping price for every item. A T-shirt, denim jacket and pair of boots can all require different packaging and postage.
The eBay and Depop fee calculator lets you include postage, packaging and stock cost when checking your margin.
Common Depop shipping mistakes
Using the address from a message
Use the address on the sale receipt. Refund and repurchase if it needs changing.
Buying postage before packing
The packaging changes the weight and dimensions. Pack first and quote second.
Sending without tracking
Tracking gives the buyer delivery visibility and gives you evidence if the parcel is delayed or disputed.
Covering the barcode with tape
Even clear tape can reflect light, wrinkle or interfere with scanning. Tape around the label, not over it.
Treating a printed label as proof of postage
Keep the actual lodgement receipt and check for an acceptance scan.
Forgetting to update Depop
For manual shipping, add the tracking number to the sold order so Depop and the buyer know it has been sent.
A simple packing checklist
Before leaving for the Post Office, confirm:
- the correct item is inside
- the item’s condition matches the listing
- the parcel is sealed securely
- the buyer address matches the Depop receipt
- the sender address is correct
- the label is flat and readable
- no tape covers the label or barcode
- no old labels remain visible
- the parcel matches the paid weight and dimensions
- you know where the tracking number will be entered in Depop
Shipping several Depop orders
Entering one address at a time is manageable for an occasional seller, but it becomes repetitive when several eBay and Depop orders need to go out together.
MyPost Business supports bulk order imports, and Listalong’s shipping workflow is designed to bring unshipped eBay and Depop sales together for Australia Post preparation. Listalong also tracks which marketplace produced each sale, so the dispatch work and sales record stay connected.
Only buy a separate label for an order that requires manual shipping. Exclude orders with a supplied Depop label from a separate postage purchase, and compare each generated order with the marketplace receipt before paying.
If you are managing both marketplaces, see the combined eBay and Depop label workflow before deciding whether it fits your orders. For a single Depop-label order, follow the supplied label workflow above.
Final answer
For a manual Depop sale in Australia:
- Open the sold order and copy the buyer’s address.
- Pack and weigh the item.
- Add the order in MyPost Business.
- Choose and pay for tracked Australia Post delivery.
- Print the label on A4 paper or a label sheet.
- Attach it flat, with tape around the edges and none over the label.
- Lodge the parcel and keep the receipt.
- Add the tracking number to Depop.
If Depop provides a prepaid label or QR code for the sale, use that order-specific shipping workflow instead.
Sources and methodology
The Depop label, QR-code and tracking instructions were rechecked on 29 September 2026. The Australia Post printing instructions retain their 28 August 2026 research date. Interfaces, shipping options and carrier prices can change, so follow the method shown on the actual order and confirm the current postage quote before paying.